Quick Tip Tuesday - Transfer Tape


Did you know that you can use transfer tape more than once?

It took me a while to learn how to make an adhesive vinyl decal with transfer tape, or even why I needed transfer tape.  I should have watched this video tutorial by Cricut. So, if you  haven't learned how to make decals with your cutting machine, I suggest the following video.

If you already know the process, did you also know you can reuse your transfer tape?  It's good for 2-3 transfers depending on the product on which you are applying the vinyl.  Give it a try!  You will save some money by not having to use new transfer tape each time you transfer vinyl.


Affiliate links - I may receive a small commission if you purchase an item from my links at no cost to you.
Feeling Crafty

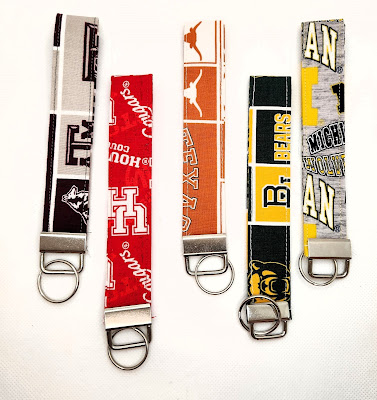
 This week, I spent some time making college keychains with all of the university fabric I could find locally.  I made keychains for Texas A&M, University of Houston, University of Texas, Baylor University,  and University of Michigan (I know, right?)  Check them out on Etsy!  I plan to look for a few more popular schools like Alabama and LSU.  I'm going to take custom orders for teams that aren't listed here, but I will have to price the fabric first.

They are really fun to make.  If you're interested in making one for yourself, I will be happy to give you the details.  Just send me a message.

I've also been practicing drawing and watercolor just for fun.  Here is a card I did.  My sister loves elephants, so she will be getting this one.


How has your crafty week been?  Check out Crafty Creators for more inspiration!

Quick Tip Tuesday - Craft storage


As crafters, we use so many different products, and usually, we like to keep them at our fingertips.  One thing I use that I absolutely love is a peg board.  I use it for rolls of foam tape, Scotch tape, ribbon, lace, bling, rulers, pens, paper towels, Cricut tools, embellishments and flowers (which I have color-coded).  

This has helped me solve a lot of issues.  I also think that how we organize our products evolves over time, because right now, I may want my cardstock in vertical storage, but later, I may decide drawers would work better.  Either way, my pegboard is here to stay.  It's the best organization tool I have ever used.


Here are the products I used:
Pegboard panels, set of 2, each is 24x24


Affiliate links - If you make a purchase, I may receive a small compensation at no extra cost to you.

Craft with Me!


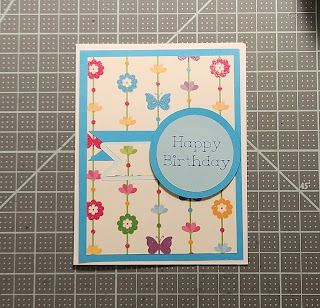
Craft with me while I make a simple birthday card.  This DIY card kit is available for purchase here with FREE SHIPPING!

If you prefer, cut your own pieces and craft along with me. You will need a card base, solid cardstock, patterned cardstock, 3 swallowtails (2 solid and 1 patterned, one of the solids slightly larger than the other two for layering), and 2 circles, one of them larger for the base and one smaller for the sentiment. Base your sizes on the size of your card base. I used an A2 card which is included in the kit that measures 4.25x5.5 inches. The kit also includes a variety of sentiments in addition to Happy Birthday.

I hope you enjoyed this video! Thanks for watching!
There is more crafty content at Crafty Creators.

Crafts I'm Making


I love crafting (in case you couldn't tell)!  I'm working on so many projects simultaneously.  Maybe I have a little ADD going on, but one project at a time is just not going to work for me.  So, here's what I'm working on (other than the constant planning and ideas in my head):

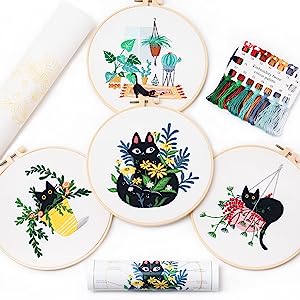
1.  Re-learning how to embroider. It's harder than I remember.


2. Personalized hand-sewn Cricut dust covers for my sister and friend for Christmas

3. Personalized and dated Christmas ornaments


4.  Faux leather book marks with suede tassels

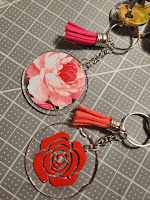
5. Acrylic key chains

6.  Sewing a reversible bucket hat (free pattern)

7.  Designs for the grandbabies' tee shirts.  I got these designs from Creative Fabrica.  I love it!


8.  University fabric key chains (like UT, Baylor, UH, ATM, Michigan)


9.  Get well cards (for family)

10. Card kit to sell (1 premade card and the materials for 4 more)


11. A layered shadow box for each granddaughter (a mermaid and a castle - the castle is done.)

12. A tote bag for travel games (Tic Tac Tote)

13. A box covered in pretty, patterned duct tapefor gift wrap and gift bags storage. Right now I'm using a hanging storage system, and it's difficult to get to things.

Visit Thursday Thirteen for more great lists!

Favorite Photos

 These are some of my recent crafts that I've really enjoyed making:

A card for my daughter - Hand-stamped and colored - Stamp from Scrapbook.com, but it is sold out.

A giant magnolia made with instructions from Abbi Kirsten Collections


Card Set - Available on Etsy with Free Shipping!


Pink Ribbon Key Fob Keychains also available on Etsy

Wow!  Can you tell I like some pink things?  For more photos visit Image-in-ing and Wordless Wednesday.

Quick Tip Tuesday - Clean Blades and Punches


 Contrary to popular belief, tin foil does not sharpen your machine cutting blade.  Some would disagree, and I will admit it can lengthen the life of your blade, but there's disagreement about whether it actually sharpens it.


What it DOES do is clean it.  Your machine blade needs an occasional cleaning "just because." If you use it to cut leather, adhesive vinyl, and especially glitter cardstock, it could use a quick cleaning.  Just a few jabs into a balled up piece of foil should do the trick, and the Cricut machine has a handy storage slot where you can keep it handy.

Quick Tip Tuesday - For Owners of Cutting Machines

 Does your paper curl when you remove it from the mat?  Don't you just hate that?

Well, that's because we've all been doing it wrong!

Tip:  Don't remove your paper from the mat.  Remove the mat from the paper.  Turn the mat over and    gently nudge a corner of your design. Hold the paper down as you remove the mat.  This really works!


Scrapbooking die cuts

 The back to school season is going to be here before we know it, so I worked on some die cuts for a school scrapbook page.


I think it makes a cute set, and I'll be listing them in my Etsy shop soon!  Thanks for visiting!


Linking up with Crafty Creators.

More Prime Day Deals

 So. Many. Great. Deals!

Apple watches, many of them 30% off.

Apple Ipad 10th generation 15% off.

11 pages of Amazon basics home and kitchen products up to 36% off!

Pages and pages of Everyday Essentials such as ibuprofen, antacid, garbage bags, coffee pods, and so much more!

Home cleaning up to 36% off.

Reebok shoes up to 53% off.

Yankee candles up to 62% off!

More deals:

More deals to come! (Affiliate links - I may receive a small commission at no extra cost to you. Thank you for your support!)

Prime Day Deals


Happy Prime Day!  Today and tomorrow will be like Black Friday on Christmas.  But without the crowds!

What are you looking for?


Firestick TV devices are all on sale, up to 58% off!  You can't beat that!  And I love my firesticks.  We have 3.  I also have a roku stick, which is fine, but the Amazon stick is more user friendly.  I love the voice feature.  Just say the name of what you want to watch, and your firestick finds your options.


Ring products are up to 66% off!  I love my Ring doorbell at the front.  I'm thinking we should put a light and camera at the back door.  It's definitely the right time to buy one! 


Only $30!
All of the Amazon basics products are on sale. I love this!  Amazon basics includes so many products, everything from cast iron dutch ovens to shower curtain rods, dish towels to sheets, furniture, toys, picture frames, storage, and office products.  There is LITERALLY something for everyone!


They even have deals on pantry staples such as spices, soups, and beans.  I love to have every-day items shipped to my door!


When you're shopping, if you use the "buy with Prime" button it will take you beyond Amazon to the company's website and offer a coupon code.  Don't forget to copy the code and clicke the blue "buy with Prime" button for a fast, seamless checkout and an extra percentage off.


I'll be back later with more deals!  

(Affiliate links - If you purchase an item, I may receive a small commission at no cost to you!)

Quick Tip Tuesday - For owners of cutting machines

 I recently discovered a tool that has helped so much in my journey of Cricut crafting. It's called a brayer. It is a rolling tool that is used to smooth and press down materials on your cutting mat.  It prevents material from moving or lifting while you cut which helps you get clean and precise cuts, No one wants jagged cuts that are hard to peel up or have torn pieces.  The brayer will help.  Don't underestimate its useful purpose.

Here is a quick video about the brayer.


I got my Cricut brand brayer from Amazon, and you can get one just like it here. (affiliate link) Thanks for watching! Let me know in the comments if you have used a brayer.

Prime Days

 It's almost time for Amazon Prime Days, and I am looking for some great deals!

One thing I have my eye on is an Amazon Echo device.  These will be 50-60% off!  It's time for us to break down and get one and coordinate it with some other smart home features we have.

I'm also looking for a compact HD Camcorder.  Cell phones are great for photos, but for professional looking videos, they still lack something.

It looks like they will have plenty of pet deals, too!

My Kindle is about to die on me.  I've had to completely restart it twice in about 8 days, and it took forever, so I am in the market for a new one.

I love Echo Park scrapbook paper, and luckily, they will be having some deals!  I'll be watching this for sure!

I'll keep you posted if I find some amazing deals!

Not a member of prime yet? What are you waiting for? Snap/EBT recipients can join for half price!  What do you get?  2 day shipping (sometimes quicker), Amazon music, Baby Registry, Wedding Registry, Prime video, and so much more!


(Affiliate links - if you decide to purchase, I may make a small commission at no extra charge to you.)

Christmas in July Craft


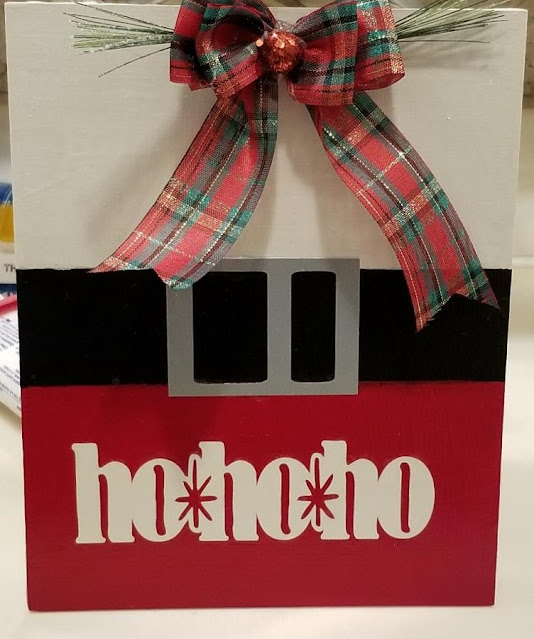
 Today I want to show you a really cute and super simple craft... a "Ho Ho Ho" sign.


1. Gather your materials.

2. I used an 8x10 thin wooden panel board.  Paint  half your board with  white acrylic paint and the other half with red leaving some blank space in between them.  Let dry. Repeat.  (Clean your foam brush before moving to another color, or have a dedicated foam brush for each color.)  I pour my acrylic paint onto a paper plate instead of a palette so I can throw it away when I am finished.

3.  Use painter's tape (and a ruler to make sure you put it on straight) to mark where you want the black "belt" to begin and end.  Paint the belt black. Let dry. You may want two coats. When everything is completely dry, carefully remove the painter's tape.

4.  I cut the silver buckle on my Cricut, but you could fussy cut it or make a different type of belt, but we all know Santa needs one.

5.  I cut the words "Ho Ho Ho" with Cardstock using my Cricut Explore Air 2, but you can use any cutting machine.  I chose to make it white, but you could also use black or silver.  Use Mod Podge to adhere the words to the bottom section.  Apply with a clean foam brush.  Go over the entire board with Mod Podge.  Let dry. Repeat.

6.  Add a bow and greenery at the top using hot glue.  I added an optional mini-ornament to the bow.

7.  Use a staple gun to attach a piece of twind or ribbon for a hanger.  Place the middle of the length of ribbon or twine on the center back of the board.  Tie the loose ends in a knot, and that's it!


Here is my list of supplies (Affiliate Links)

8x10 Birch panel

Acrylic paint in red, black, and white.

Sponge foam brush

Painter's Tape

Silver cardstock

White cardstock

Cricut Explore Air 2

Standard Grip Cutting Mat (This pack of 2 is on sale now for 50% off!)

Mod Podge

Christmas Ribbon - I had on hand

Christmas greenery - I had on hand

Twine or ribbon

Visit Crafty Creators for more inspiration!


Quick Tip Tuesday - For Sewing


Today's tip is about a very small tool that is extremely useful when sewing.  A seam ripper!  Face it, everyone is going to make mistakes, even professionals, and when you do, using the seam ripper let's you go back however many steps you need to go back to get to the place where you made the mistake.  It has saved my projects many times over.

Image Credit

Just be careful and don't cut yourself on the blade in between the point and the neck where the J shape is.  I never understood until recently that there is an actual blade there.  The seam ripper is your friend, but don't let it hurt you.

I tend to lose them easily, so a two-pack is always a good idea. One small, one large.


 One with an ergonomic grip for people who have arthritis like me. Seam ripping can be tedious.  

 This is a handy kit with several seam rippers and two types of scissors. I have small nippers like the ones in this kit, and I love them!


(Amazon Affiliate links)