1. Making Cards
13 Crafts I Pursue
1. Making Cards
Favorite Weekly Project - Infusible Ink Cosmetics Bag
I have been wanting to use infusible ink (again, as I tried it last Christmas and liked the look), so I decided to take the plunge. I used a Cricut cosmetic bag blank and the rainbow triangles infusible ink. I used a brushstroke pattern for the background then used regular Cricut iron-on vinyl in black for the words. Both sides are the same. I'm using this bag to store all of my ink-blending tools because the drawstring bag I had them in was getting too small.
I love the vibrancy of the infusible ink and how it becomes part of the fabric. It was not as difficult as I remembered. The process went very smoothly following Cricut's directions. I hope you'll give infusible ink a try!
Quick Tip Tuesday - for People who Want to Learn to use Vinyl, specifically Heat Transfer
You've learned how to use adhesive vinyl, perhaps starting with the removable kind. You're ready for a step up, and you've chosen some 100% cotton tee shirts, a baby onsie, or even a tote bag, and you want words or a design to go on them. After you prewash, you need to decide what medium you will choose.
There are so many styles and brands of vinyl out there. Choose smooth HTV/iron on vinyl from Cricut, Siser EasyWeed, or Oracal. These are reputable companies in the industry that have the most success in beginning crafts(and the ones I've had the most luck with).
As you may have noticed, there is a wide variety of HTV (Heat Transfer Vinyl) or Iron-on vinyl. There's glitter, flocked, holographic, matte, glossy, patterned, glow-in-the-dark, and more!
As a beginner, my tip is to use standard, SMOOTH glossy HTV (or IRON ON, same thing) on your beginning projects. Once you've mastered that, it will be easy to start using the other types of vinyls.
Don't forget to mirror! And use the Cricut Heat Guide. Have fun!
Quick Tip Tuesday for Cricut
Today's tip: You do not need to purchase anything to learn to use your Cricut!
There are so many crafters who have created e-books, guides, getting started instructions, youTube videos, and so on. This just isn't necessary!
If you go to learn.cricut.com, you can search for any topic. You'll find how-tos, tutorials, and courses on literally every topic related to Cricut from how to set up your machine to how to use print-then-cut and everything in between!
Learn from the pros and save your money and your time!Quick Tip Tuesday - For Owners of Cutting Machines
Have you ever cut something with your cutting machine that came out completely torn? Here are 3 troubleshooting strategies you can try.
First, make sure you are using quality paper or cardstock. A paper with weight between 65 and 80 with a solid core is going to be your best bet. Altenew has a resource with all you ever wanted to know about crafting paper.
Second, is your mat still sticky? If not, try washing it (see previous tip on how to do this). If it still doesn't cut neatly, you may need a new mat. Use a brayer to adhere the paper to your mat (another previous tip).
Third, if the paper and the mat didn't solve the problem, you may need to clean your blade. How, you ask (also a previous tip.)? Clean it by sticking the tip of the blade into a balled up piece of foil. You especially need to clean it after using anything with glitter on it. If that doesn't help, try a new blade.
I hope these quick strategies will solve your torn paper problems.
P. S. Join my free Facebook group - Crafts for All
Quick Tip Tuesday - Transfer Tape
Did you know that you can use transfer tape more than once?
It took me a while to learn how to make an adhesive vinyl decal with transfer tape, or even why I needed transfer tape. I should have watched this video tutorial by Cricut. So, if you haven't learned how to make decals with your cutting machine, I suggest the following video.
If you already know the process, did you also know you can reuse your transfer tape? It's good for 2-3 transfers depending on the product on which you are applying the vinyl. Give it a try! You will save some money by not having to use new transfer tape each time you transfer vinyl.
Affiliate links - I may receive a small commission if you purchase an item from my links at no cost to you.
Crafts I'm Making
I love crafting (in case you couldn't tell)! I'm working on so many projects simultaneously. Maybe I have a little ADD going on, but one project at a time is just not going to work for me. So, here's what I'm working on (other than the constant planning and ideas in my head):
1. Re-learning how to embroider. It's harder than I remember.
2. Personalized hand-sewn Cricut dust covers for my sister and friend for Christmas
3. Personalized and dated Christmas ornaments
4. Faux leather book marks with suede tassels
7. Designs for the grandbabies' tee shirts. I got these designs from Creative Fabrica. I love it!
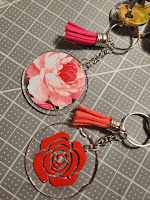
8. University fabric key chains (like UT, Baylor, UH, ATM, Michigan)
9. Get well cards (for family)
10. Card kit to sell (1 premade card and the materials for 4 more)
11. A layered shadow box for each granddaughter (a mermaid and a castle - the castle is done.)
12. A tote bag for travel games (Tic Tac Tote)
13. A box covered in pretty, patterned duct tapefor gift wrap and gift bags storage. Right now I'm using a hanging storage system, and it's difficult to get to things.
Visit Thursday Thirteen for more great lists!
Quick Tip Tuesday - For Owners of Cutting Machines
Does your paper curl when you remove it from the mat? Don't you just hate that?
Well, that's because we've all been doing it wrong!
Tip: Don't remove your paper from the mat. Remove the mat from the paper. Turn the mat over and gently nudge a corner of your design. Hold the paper down as you remove the mat. This really works!
Quick Tip Tuesday - For owners of cutting machines
I recently discovered a tool that has helped so much in my journey of Cricut crafting. It's called a brayer. It is a rolling tool that is used to smooth and press down materials on your cutting mat. It prevents material from moving or lifting while you cut which helps you get clean and precise cuts, No one wants jagged cuts that are hard to peel up or have torn pieces. The brayer will help. Don't underestimate its useful purpose.
Here is a quick video about the brayer.
Recent Crafts
I have been having so much crafting fun this week! I've been working on some paper projects for my twins' upcoming birthday. These aren't my designs, so I won't include them in my Etsy shop, but I thoroughly enjoyed creating them. I will link the designers below this post so you can get the files, too. They are FREE! (You may have to sign up for a newsletter, but otherwise, no cost except your own materials.)
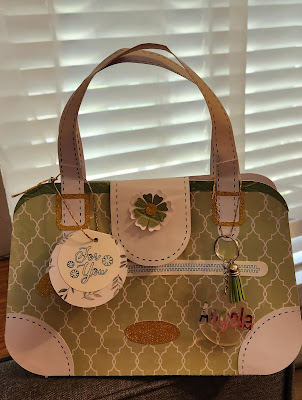 |
| This is the front |
 |
| This is the back |
 |
| Tools |
 |
| Mustache |
Quick Tip Tuesday
Today's tip is for Cricut owners.
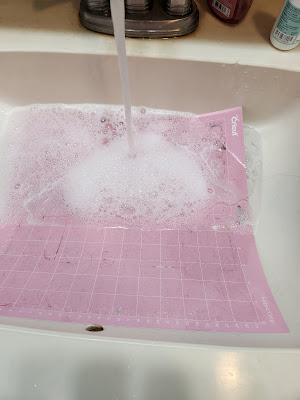
You know how you hate when you don't get a clean cut? Many times it is because your mat isn't sticky enough. You may not be able to notice with the naked eye, but your mat is moving a little every time the machine moves, and you're left with a wacky cut.
Instead of throwing your mat away, try washing it first.
 |
| Let your mat(s) air dry. I set mine on the side of the tub for a couple of days to make sure the front and back were completely dry. |
Cricut Insert Cards? Yes, please!
When the new Cricut card-cutting mat (not an affiliate link) came out, I was so excited. I tried to make some cut-away cards and didn't have much luck lining up the card for the "pen part" or completely cutting away the letters. So... I put it aside for a long while.
This week I decided to try insert cards, and I am obsessed with how pretty they can be and how easy it is! I don't remember who the designer is, or if it even said who it is. Both cards were found in projects→insert cards→Easter. Instead of using foil, which I imagine is gorgeous, I simply used my pens. I'm excited to send these!
You can see some gorgeous crafts and diy projects at Crafty Creators and Happiness is Homemade.
-
Hello! Are you enjoying this wonderful happy day? Me, too! If happiness is a completed project, then I am beyond happy right now. I decid...
-
This seems to be how people view Texas... and it is true! But... there is a lot more to Texas that isn't captured in these photos. Ho...
-
1. Making Cards 2. Scrapbooking 3. Sewing ( gift card holders, wall hangings,purses, and dresses for my granddaughters. ) 4. Tee shirts ...


.jpg)


