1. Making Cards
13 Crafts I Pursue
1. Making Cards
Quick Tip Tuesday - Your First Step
When you sit down to make a card or a scrapbook page, step one is to choose a color scheme. For example, if you are making a page with cruise pictures, look at the colors in the photos and let that help guide you in creating a color palette of 3 or 4 colors.
 |
| peachy-pink, white, and mint (with a hint of yellow) |
 |
| light blue, gray, white |
Scrapbook Pages
My sister and I and our husbands went on a cruise together last year. We had never taken a vacation with just the four of us! This trip gave me layouts to demonstrate how I make pages with one photo or multiple photos. The bottom line, if the picture was taken professionally and is at least 5x7, I will usually put it on its own page. Otherwise, I use multiple snapshots on each page. Below are some examples from our trip.
Have a crafty week! And check out my Etsy shopEtsy shop if you get a chance. Thank you.
Quick Tip Tuesday - Scrapbook Photos
A simple way to elevate your scrapbook page is to mat your photos.
These photos are not matted. I like this page. It was simple and easy, and the journaling captures elements of our family's personality.
And while there is nothing wrong with this particular layout, an easy way to make your photos stand out is to mat them in a coordinating color or pattern, and it takes very little time.Take it up another notch with double mats!Happy Crafting!
Quick Tip Tuesday-Paper Crafts
For scrapbooking or card-making, my tip today is to try a new technique. I tried inlaid die cutting this week, and I liked the results. I prefer the card on the left, though,
I also did some watercoloring on a stamped image. I'm pleased with the look but not the way the sentiments turned out. But I remind myself, "It's only paper! I can do it again!" I like the lettering on the one on the left, but I prefer the background on the right. My point, though, is try something new! You've got nothing to lose!
You could try stamping, embossing, die-cutting, watercoloring, brads, eyelets, adding ribbon or other ephemera. Choose one new thing to try before the month ends. Go for progress, not perfection! Good luck and have a crafty week!
Visit Happiness is Homemade and Pinterest for inspiration.
Quick Tip Tuesday - for scrapbookers
I love scrapbooking! In fact, I'm leaving for a scrapbook retreat tomorrow with my sister. We have been doing once or twice a year scrapbook trips that started the year our father passed away, so for the last almost 20 years.
My tip today is for beginners.
The first thing you need to do when you start your journey into scrapbooking is decide on a size of album because that will influence the decisions you make when selecting layouts, embellishments, and photos. Read on if you need information about the different sizes available.
I chose the most common size (here in the US) which is 12 by 12 inches. This gives you plenty of room to create lovely layouts with multiple photos on a page.
Next is 8.5 by 11 inch, standard notebook paper size (here is the US). You still have a decent amount of room for your layout, but it is slightly more portable.
Some scrapbookers choose 8 by 8 inches. There is space for approximately one photo per page unless you trim your photos to smaller sizes, and it's also a fairly common size.
Last, you could choose 6 by 6 inches. If you prefer to do smaller, quicker layouts, this is the size for you.
The size you select is completely up to you, but choose one to stick with, at least for a while, rather than purchasing supplies in multiple sizes. Base your size on the amount of content you want for each page as well as your personal style. Happy scrapping!
Scrapbooking die cuts
The back to school season is going to be here before we know it, so I worked on some die cuts for a school scrapbook page.
I think it makes a cute set, and I'll be listing them in my Etsy shop soon! Thanks for visiting!
Linking up with Crafty Creators.
Quick Tip Tuesday - For owners of cutting machines
I recently discovered a tool that has helped so much in my journey of Cricut crafting. It's called a brayer. It is a rolling tool that is used to smooth and press down materials on your cutting mat. It prevents material from moving or lifting while you cut which helps you get clean and precise cuts, No one wants jagged cuts that are hard to peel up or have torn pieces. The brayer will help. Don't underestimate its useful purpose.
Here is a quick video about the brayer.
Scrapbooking Tools I Can't Live Without
Aside from paper and photos, there a so many tools that people use when scrapbooking. Here are the top tools that I can't live without.
1. A good tape runner - I swear I use more of this than anything!
2. Sharp scissors - Creative Memories and Fiskars are my go-to craft suppliers.
3. Paper trimmer - This is the one I have.
4. Quality Photos, of course!
5. Ruler - any ruler will do.
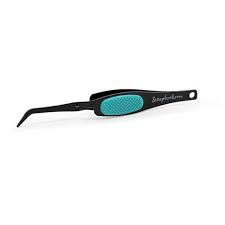
6. Reverse Tweezers These are great when you need to pick up someting small.
7. Corner rounder for photos.
8. Embellishments such as bows, flowers, ribbon, buttons, stickers, die cuts, brads, bling.
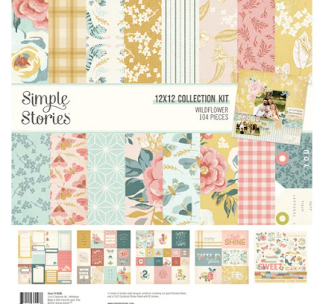
9. Cute paper that is also high quality and won't tear in my cutting machine.
10. Quick Stick by We R Memory Keepers. This really helps when you need to place small items in a very specific place.
12. Xyron machine (for making any cut item into a sticker without a printer)
13. Computer to connect with Cricut for cute images and titles. And sometimes I want to type out my journal box and print it instead of handwriting. Any computer will do.
I could probably go on, but these are the basics.
Link up with the New Thursday Thirteen for more fun!
-
Hello! Are you enjoying this wonderful happy day? Me, too! If happiness is a completed project, then I am beyond happy right now. I decid...
-
This seems to be how people view Texas... and it is true! But... there is a lot more to Texas that isn't captured in these photos. Ho...
-
1. Making Cards 2. Scrapbooking 3. Sewing ( gift card holders, wall hangings,purses, and dresses for my granddaughters. ) 4. Tee shirts ...


.jpg)


